Friday, December 31, 2010

The Bees Are Flying!

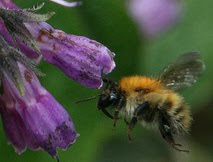
I will admit it… I am a mother hen type. I worry about my bees in the winter.  But today I put my worries aside for awhile and rejoice in the fact we are having a warm enough day the bees can do what bees need to do. Run outside and potty (they are too tidy to do this in their hive), haul out the deceased, and joyfully spread their wings, landing on anything that might be a flower. This especially applied to me as to a bee, in my white bee suit, I look like a great big flower! lol They seemed to truly be fascinated with my light yellow gloves:)

GEDC0903

GEDC0907

I brought the bees out a bit of holiday cheer, in the form of the wax left over from the last time Eric and I crush and strained some honey. It had been stored in a big bucket on top of one of my apothecary cabinets. I directed a few of my hitchhikers to it.GEDC0905

GEDC0909

The bees you see here will probably not live to see summer, so I give them back a taste of summer with my thanks and blessings upon them.

It warmed up during the night and by morning thunder, lightening and showers were happening. The rain finally broke this afternoon and the sun came out to shine magnificently! This will rapidly change and we will be plunged back into winter tonight. I think the forecast is for something like a 40 degree fluctuation in temperatures today! I am going back outside to watch the bees a bit, then I will have to shoo them off their present of honey wax in a bucket so they will get back to their homes before the falling temperatures catch them too far away to make it home. Even though the bucket is just a few yards from the hives, inside will be warmer than outside the bucket, and the lure of honey so strong, by the time they are ready to go home, unless I have shooed them out already, my gift will become their grave as they just can’t move when it drops to a certain point. So off I go to see how many others have came to have a treat. I am sure after the first bees filled up they dashed to the hive to do a waggle dance to entice their sisters to the feast!

Big hugs to all who visit Comfrey Cottages

Thursday, December 30, 2010

Herbal First Aid kit and Herbal Books

I am learning about being prepared for life’s little and big  dramas such as blisters, tummy troubles, acne, broken bones,stings and other common things that happen. Learning to regulate our reactions, how we can comfort and tend ourselves and loved ones, who can help and other necessary tools. This can be your own design to suit your own needs. I knew straight off I needed one that travelled well. What I would eventually like is not what I ended up with at the moment, but it will suit for now, and can be put to another purpose later. I have started to add things to it and will keep adding things over the next few weeks, I am certain. But for now, it is a work in progress. This will be handy to grab and shove in my backpack as I head out each day. Whether it is in the bee yard, the park, boating, minding the grandchildren or foraging through the woods, it will not be a hindrance and is fairly sturdy. I am making index cards I am going to laminate on which herbs to use for what purpose, in the event someone else needs to use my kit and with an eye towards future presents for my family members, so each household feels empowered that they too can learn to care for their families with herbs and confidence.
GEDC0901
a little fennel for the tummy and a bit of heat might be needed…
GEDC0900
GEDC0899
No doubt about who actually runs the apothecary! lol Wisteria!
I take a bit of time doing each one of my assignments…. there is just so much and it is presented in such a way my creative side takes over and I am inspired to do things like this….
GEDC0897
I make recipe cards of the recipes of herbal tidbits.. And I also make little mini lessons to refer back to. These cards will help me make the cards I want to include in my portable kit as well as my home apothecary. 
 Part of the books I ordered for my dh to give me ;-)
GEDC0889
I am thrilled to have just received two of the books from the ethno-botanical list. 
GEDC0892
GEDC0893
These are a few of the books I customarily refer to of my own gathering over the last few years
GEDC0891
the above books are all in my kitchen:) Anyone else a bookaholic?
Was Santa Claus nice to everyone? Santa, aka Eric, was very nice to me this year, as well as my family and friends! I feel utterly spoiled!
GEDC0895
GEDC0896
Eric and I found all those herbal books while together at an antique store:) Nice they ended up in my basket! Lovely teas, and handcrafted soaps and some seeds! Oh my! I am so psyched to grow nicotiana! I can just smell it on a late June evening now…. dreamy:)
I will keep you posted with updates on how my herbal medicine chest progresses.
I gave Eric a pretty cool gift. If we all ask him nice, maybe he will start posting about it. I have given him blog permission;-)
Big hugs to all who visit Comfrey Cottages

Saturday, December 18, 2010

Whole Lotta Soaping Going On!

Yesterday found me learning to do something I have always want to learn! Soap making! Our friend Jill, who is in our beekeeping group and our herb group, invited me over to her house to learn to make both goat’s milk soap and pine tar soap. Here is the recipe we used for the goat’s milk soap

28 ounces lard

24 ounces coconut oil

24 ounces olive oil

4 ounces castor oil

27 ounces of frozen goat’s milk, mostly defrosted and big hunks chopped up ( you could use any milk or water)

11. 5 ounces of lye

First thing Jill did was line her molds with parchment paper, for easy removal after the soap cured. She also lined some extra baking dishes with parchment paper for the extra. So you see, you could start soaping without any specialized bits and pieces if you wanted to!

GEDC0639

The first step was to measure out and add the lard, coconut oil, olive oil and castor oil to a stainless steel pot. Do Not use an aluminum pot! There would be a terrible reaction when you added the lye later! No aluminum mixing spoons or pots allowed in soap making.

GEDC0642

Jill used a handy dandy digital scale her husband has for his work to measure as she went. But not necessary folks, you could just measure as usual, but be mindful to be precise. After the lard and oils were measured and put in the pot, it went on the stove top to gently melt down

GEDC0646

GEDC0647

Next, a second stainless steel pot was got out and the goat milk measure into it. Then the lye was added SLOWLY to the milk and stirred with a stainless steel spoon. You have to stir until the lye is dissolved completely or you will end up with a piece of lye in your soap and that would burn you! Lye is very caustic and reacts with the fats and oils in your skin, is you get it on you. Rather like turning your skin into soap! Ugh!

GEDC0651

(that is the bag of lye. care must be used to keep it very dry before use)

GEDC0652

Do note, protective eye and hand gear used when starting to work with the lye part of the recipe! Here Jill is measuring the lye.

GEDC0655

And slowly adding the lye to the milk, while stirring. It turned a beautiful yellow color and smelled like oysters at this point!

GEDC0657

After the lye was thoroughly dissolved in the milk the pan is brought over to the pan of gently melted oil and lard and poured into it. ( Just get the oils melted and then turn off the heat)

GEDC0658

Jill had an immersion blender she used for mixing it all together until it reached the trace stage. You could do it by hand, but a bit more work:) I had always heard of this trace, but wasn’t sure what it was. After you see it once, you will know though. Here is a good explanation

Trace is the so-called "point of no return" in soap making. It is the point where the oils or the fats in your soap have successfully mixed with your lye solution. More appropriately, this is the point where your oils and your lye turn into soap. The following are the tell-tale signs of trace:

  • Your soap has a thick consistency similar to cake batter after you've mixed it.
  • If after you drizzle some of the soap on the surface of the mixture, it leaves behind a "trail" that takes a while to sink back in the mixture.

So after we reached trace, it was time to fill the molds!

GEDC0662

GEDC0663

Jill’s darling homeschooled daughter kept us company:)

After the soap sat up a bit, it was moved to a warm spot where it will finish reacting for a week.

Jill made the first batch, while I documented and took notes, and then she had me make the second batch:) Easy breezy really. Just like following any other recipe!

I will share the Pine Tar soap recipe in a different post later. I gotta run go get my vehicle from the repair shop!

Big hugs to all who visit here at Comfrey Cottages:)


Horsing Around with Horseradish

This months herb group meeting was so much fun! Although, someone might not think so if they just peered in the windows! lol Horseradish makes your eyes tear and your nose run, while processing it. We all had to leave the room periodically, for some fresh air. I do know that everyone who came to the meeting with stuffy, stopped up sinus issues, left feeling better from the good clean out horseradish fumes gave them!! :)

GEDC0626

That’s Steve. Look at his poor face! Tears just a streaming! We have been having the last few meetings in his outbuilding. I think he was the winner for lasting the longest in the processing room, without a break.

The first step in processing horseradish is to dig your horseradish. We all got ours dug and pooled out resources. Here is Eric with our root we brought

GEDC0620

The first thing we did was put them all in a big tub of water, and gave them a good scrubbing with the scrub brushes. Then these rough cleaned roots are put into another pan of water. Then it is time to peel them with knives or vegetable peelers and cut them down to a size that will fit into our hand crank grinder.

GEDC0617

GEDC0618

GEDC0623

GEDC0624

GEDC0621

We took this rough grated horseradish and then placed it in a regular blender, added white vinegar till it was just a bit below the level of the root, added a good shake of fruit fresh, another of salt and gave it a whirl! Here is Steve pouring some into one of the jars

GEDC0619

Now you wouldn’t have to do the blender part if you didn’t want to. You could leave it coarser and then add your other ingredients to suit you. Or you could do like some folks preferred and really blend it down totally smooth. Just a matter of preference really.

We all just took turns rotating around to the different jobs and dashing to the other room to blow our nose and wipe our tears, and recover with some hot chocolate and cookies :)

We made so much that all of us had plenty of horseradish to take home.

Unfamiliar with the history of horseradish? Have a look at what Maude Grieve’s A Modern Herbal has to say about it here. I can sure vouch for its fumes clearing out your head! lol

Big hugs to all of you who visit here at Comfrey Cottages