Friday, December 31, 2010

The Bees Are Flying!

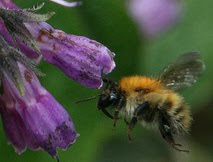
I will admit it… I am a mother hen type. I worry about my bees in the winter.  But today I put my worries aside for awhile and rejoice in the fact we are having a warm enough day the bees can do what bees need to do. Run outside and potty (they are too tidy to do this in their hive), haul out the deceased, and joyfully spread their wings, landing on anything that might be a flower. This especially applied to me as to a bee, in my white bee suit, I look like a great big flower! lol They seemed to truly be fascinated with my light yellow gloves:)

GEDC0903

GEDC0907

I brought the bees out a bit of holiday cheer, in the form of the wax left over from the last time Eric and I crush and strained some honey. It had been stored in a big bucket on top of one of my apothecary cabinets. I directed a few of my hitchhikers to it.GEDC0905

GEDC0909

The bees you see here will probably not live to see summer, so I give them back a taste of summer with my thanks and blessings upon them.

It warmed up during the night and by morning thunder, lightening and showers were happening. The rain finally broke this afternoon and the sun came out to shine magnificently! This will rapidly change and we will be plunged back into winter tonight. I think the forecast is for something like a 40 degree fluctuation in temperatures today! I am going back outside to watch the bees a bit, then I will have to shoo them off their present of honey wax in a bucket so they will get back to their homes before the falling temperatures catch them too far away to make it home. Even though the bucket is just a few yards from the hives, inside will be warmer than outside the bucket, and the lure of honey so strong, by the time they are ready to go home, unless I have shooed them out already, my gift will become their grave as they just can’t move when it drops to a certain point. So off I go to see how many others have came to have a treat. I am sure after the first bees filled up they dashed to the hive to do a waggle dance to entice their sisters to the feast!

Big hugs to all who visit Comfrey Cottages

Thursday, December 30, 2010

Herbal First Aid kit and Herbal Books

I am learning about being prepared for life’s little and big  dramas such as blisters, tummy troubles, acne, broken bones,stings and other common things that happen. Learning to regulate our reactions, how we can comfort and tend ourselves and loved ones, who can help and other necessary tools. This can be your own design to suit your own needs. I knew straight off I needed one that travelled well. What I would eventually like is not what I ended up with at the moment, but it will suit for now, and can be put to another purpose later. I have started to add things to it and will keep adding things over the next few weeks, I am certain. But for now, it is a work in progress. This will be handy to grab and shove in my backpack as I head out each day. Whether it is in the bee yard, the park, boating, minding the grandchildren or foraging through the woods, it will not be a hindrance and is fairly sturdy. I am making index cards I am going to laminate on which herbs to use for what purpose, in the event someone else needs to use my kit and with an eye towards future presents for my family members, so each household feels empowered that they too can learn to care for their families with herbs and confidence.
GEDC0901
a little fennel for the tummy and a bit of heat might be needed…
GEDC0900
GEDC0899
No doubt about who actually runs the apothecary! lol Wisteria!
I take a bit of time doing each one of my assignments…. there is just so much and it is presented in such a way my creative side takes over and I am inspired to do things like this….
GEDC0897
I make recipe cards of the recipes of herbal tidbits.. And I also make little mini lessons to refer back to. These cards will help me make the cards I want to include in my portable kit as well as my home apothecary. 
 Part of the books I ordered for my dh to give me ;-)
GEDC0889
I am thrilled to have just received two of the books from the ethno-botanical list. 
GEDC0892
GEDC0893
These are a few of the books I customarily refer to of my own gathering over the last few years
GEDC0891
the above books are all in my kitchen:) Anyone else a bookaholic?
Was Santa Claus nice to everyone? Santa, aka Eric, was very nice to me this year, as well as my family and friends! I feel utterly spoiled!
GEDC0895
GEDC0896
Eric and I found all those herbal books while together at an antique store:) Nice they ended up in my basket! Lovely teas, and handcrafted soaps and some seeds! Oh my! I am so psyched to grow nicotiana! I can just smell it on a late June evening now…. dreamy:)
I will keep you posted with updates on how my herbal medicine chest progresses.
I gave Eric a pretty cool gift. If we all ask him nice, maybe he will start posting about it. I have given him blog permission;-)
Big hugs to all who visit Comfrey Cottages

Saturday, December 18, 2010

Whole Lotta Soaping Going On!

Yesterday found me learning to do something I have always want to learn! Soap making! Our friend Jill, who is in our beekeeping group and our herb group, invited me over to her house to learn to make both goat’s milk soap and pine tar soap. Here is the recipe we used for the goat’s milk soap

28 ounces lard

24 ounces coconut oil

24 ounces olive oil

4 ounces castor oil

27 ounces of frozen goat’s milk, mostly defrosted and big hunks chopped up ( you could use any milk or water)

11. 5 ounces of lye

First thing Jill did was line her molds with parchment paper, for easy removal after the soap cured. She also lined some extra baking dishes with parchment paper for the extra. So you see, you could start soaping without any specialized bits and pieces if you wanted to!

GEDC0639

The first step was to measure out and add the lard, coconut oil, olive oil and castor oil to a stainless steel pot. Do Not use an aluminum pot! There would be a terrible reaction when you added the lye later! No aluminum mixing spoons or pots allowed in soap making.

GEDC0642

Jill used a handy dandy digital scale her husband has for his work to measure as she went. But not necessary folks, you could just measure as usual, but be mindful to be precise. After the lard and oils were measured and put in the pot, it went on the stove top to gently melt down

GEDC0646

GEDC0647

Next, a second stainless steel pot was got out and the goat milk measure into it. Then the lye was added SLOWLY to the milk and stirred with a stainless steel spoon. You have to stir until the lye is dissolved completely or you will end up with a piece of lye in your soap and that would burn you! Lye is very caustic and reacts with the fats and oils in your skin, is you get it on you. Rather like turning your skin into soap! Ugh!

GEDC0651

(that is the bag of lye. care must be used to keep it very dry before use)

GEDC0652

Do note, protective eye and hand gear used when starting to work with the lye part of the recipe! Here Jill is measuring the lye.

GEDC0655

And slowly adding the lye to the milk, while stirring. It turned a beautiful yellow color and smelled like oysters at this point!

GEDC0657

After the lye was thoroughly dissolved in the milk the pan is brought over to the pan of gently melted oil and lard and poured into it. ( Just get the oils melted and then turn off the heat)

GEDC0658

Jill had an immersion blender she used for mixing it all together until it reached the trace stage. You could do it by hand, but a bit more work:) I had always heard of this trace, but wasn’t sure what it was. After you see it once, you will know though. Here is a good explanation

Trace is the so-called "point of no return" in soap making. It is the point where the oils or the fats in your soap have successfully mixed with your lye solution. More appropriately, this is the point where your oils and your lye turn into soap. The following are the tell-tale signs of trace:

  • Your soap has a thick consistency similar to cake batter after you've mixed it.
  • If after you drizzle some of the soap on the surface of the mixture, it leaves behind a "trail" that takes a while to sink back in the mixture.

So after we reached trace, it was time to fill the molds!

GEDC0662

GEDC0663

Jill’s darling homeschooled daughter kept us company:)

After the soap sat up a bit, it was moved to a warm spot where it will finish reacting for a week.

Jill made the first batch, while I documented and took notes, and then she had me make the second batch:) Easy breezy really. Just like following any other recipe!

I will share the Pine Tar soap recipe in a different post later. I gotta run go get my vehicle from the repair shop!

Big hugs to all who visit here at Comfrey Cottages:)


Horsing Around with Horseradish

This months herb group meeting was so much fun! Although, someone might not think so if they just peered in the windows! lol Horseradish makes your eyes tear and your nose run, while processing it. We all had to leave the room periodically, for some fresh air. I do know that everyone who came to the meeting with stuffy, stopped up sinus issues, left feeling better from the good clean out horseradish fumes gave them!! :)

GEDC0626

That’s Steve. Look at his poor face! Tears just a streaming! We have been having the last few meetings in his outbuilding. I think he was the winner for lasting the longest in the processing room, without a break.

The first step in processing horseradish is to dig your horseradish. We all got ours dug and pooled out resources. Here is Eric with our root we brought

GEDC0620

The first thing we did was put them all in a big tub of water, and gave them a good scrubbing with the scrub brushes. Then these rough cleaned roots are put into another pan of water. Then it is time to peel them with knives or vegetable peelers and cut them down to a size that will fit into our hand crank grinder.

GEDC0617

GEDC0618

GEDC0623

GEDC0624

GEDC0621

We took this rough grated horseradish and then placed it in a regular blender, added white vinegar till it was just a bit below the level of the root, added a good shake of fruit fresh, another of salt and gave it a whirl! Here is Steve pouring some into one of the jars

GEDC0619

Now you wouldn’t have to do the blender part if you didn’t want to. You could leave it coarser and then add your other ingredients to suit you. Or you could do like some folks preferred and really blend it down totally smooth. Just a matter of preference really.

We all just took turns rotating around to the different jobs and dashing to the other room to blow our nose and wipe our tears, and recover with some hot chocolate and cookies :)

We made so much that all of us had plenty of horseradish to take home.

Unfamiliar with the history of horseradish? Have a look at what Maude Grieve’s A Modern Herbal has to say about it here. I can sure vouch for its fumes clearing out your head! lol

Big hugs to all of you who visit here at Comfrey Cottages


Sunday, November 21, 2010

Let’s Talk about Knives

I must confess to never really paying attention to knives, other than they were sharp. My husband has a nice collection of knives he keeps sharp, and to be honest, I have just been borrowing his when chopping up roots, herbs, veggies, etc. I have been known just to grab a steak knife, or the bigger ones he has, that I vaguely knew he had basically for processing wild game and fish. 
GEDC0437
Now folks, do not judge me too harshly on my ignorance of knives, please. There is a story behind my lack of interest in learning about knives… When I was about nine years old, a friend and her family invited me out to dinner with them. We ended up going to a restaurant with table clothes and more silverware than I was accustomed to.  When our meals arrived, I looked forlornly at mine and had to shyly ask my friends dad if he would cut up what needed cut up. You see, my dad had not allowed me a knife, other than a butter knife before. I confess to being a bit klutzy, so certain he had his reason! lol My husband tends to hover when I am using a knife also, so to be honest.. I have had this idea that using knives was just not a skill I had a need to learn. My husband had brought me home a set of knives awhile ago, so I finally got them out to see if they were more appropriate, according to what I was learning with my lesson. Knives are tools, and with this lesson I have learned quite a lot about them! The top one in the picture is a meat cleaver, for whacking through bones, and the bottom one is a meat carver. Both will hurt your hands if used much, and this I can attest to as these are what I have been using! Both are excellent knives, with the tang going into a wooden handle, and riveted. But, their blade shape and size make them both wrong for the apothecary work. Seems the ones my husband had brought home were ideal for my needs. Notice the different size and shapes. The top one is sometimes called a Chef’s knife and then the smaller paring knife version of it, below.
GEDC0442
I have since told my husband about this lesson and he said that he was just hoping to get me to stop dulling his knives when he brought home the others! I told him what I have learned and he said, “Well, I am certain my grandmother would have just used these I have also!” I said, well maybe, but I bet she would appreciate the weight and design of these new ones. He then actually hefted mine and looked them over and was surprised and understood where they would be the better choice for my apothecary purposes and would be much nicer to use:) With a nudge from this lesson, I intend to learn how to sharpen my own knives also.
Now where to store those knives, to keep them clean and sharp? Some of our knives have been stored in this wooden block , which is fine, except for one thing,
GEDC0500
When you look at the picture of the block I will be using, see if you can spot the main difference between the two, other than the lovely painted scene by my favorite local artist, Ray Phillips,
GEDC0499
Do you see what the difference is? It is the the angle of the slot the knives go in.  With the old block, the constant pressure of the knives on the wood, (when not in use),  and the drawing out of the knives,(when going to be used), both dull your knives! The pretty one, (I had got for a gift), will now be used for my apothecary knives, rather than being put up just as a decorative.

Friday, November 19, 2010

Herbalist’s Apothecary Tools, Labels

GEDC0443
I left you all last with my needing to look up the botanical names of the  herbs in my apothecary cabinets, and then making new labels with both this botanical name and the common name. I also needed to do the same for labeling the different herbal extractions (honeys, vinegars, oils and alcohol, etc.). I debated on making my own labels, and threw that out the door as my printer just guzzles ink. I then did a little web search and found some gorgeous labels, but, money is a consideration, so maybe those someday…For now, I am quite satisfied with the apple trimmed designed ones I found quite cheaply at a local store. I have spent most of my free time, the last few days, getting these labels filled out and affixed, and taking an inventory of other tools that I will find useful in my home apothecaries. Knives slowed me down a bit, as I was pretty clueless on all the different types of knifes and have been blissfully just using me husbands different knives, (I have since learned are for meat and bones), all this time! I have since dug out a package of knives my husband had brought me awhile back. I am guessing now that at the time he was hoping I would use them and quit dulling his! lol I havelearned about different sorts of cloths, and what and where they would be used and the reasons why each sort was suitable for each purpose. In the pictures are some of the lovely flat weave towels my brother Eric and others have gifted me. These will become liners for my gathering baskets. What good karma that will import to each gathering session, as each of these towels have good memories associated with them:) Containers, jars, funnels, brushes, cutting blocks, scissors, tapes, strainers and more were also sorted through. I seem to have an until now, undiagnosed fetish for strainers! lol And jars/containers! I would like to get a nice copper bowl, a small whisk (I know Eric, you tried to get me to buy that one when we were in the Kitchen shop in Galesburg shopping), and a few other things. I would like a nice natural bristle small brush, some more metal funnels, and a few other things. Many items such as the pots, bowls, wooden spoons, etc. , I am satisfied with what I have already. Most of my jars are narrow mouth and in the future am going to be getting some nice wide mouth ones. I started this apothecary with what was on hand and found through yard sales, etc, etc originally, so I am very much enjoying the process of tightening up in this tool department and knowing just what will best serve me so I can keep an eye out for these items.
 My husband had this wooden cutting board stored in the cabinet. I am going to use vinegar to clean and resurrect it for the time being. It doesn’t look to be cracked up, and is a solid piece of wood, so hopefully after cleaning it with apple cider vinegar and oiling it with vegetable oil, as she suggested, it will be fine. I am thinking that I might bring this subject up at our next herb meeting, as several of our members do timber work and I might interest one of them into crafting a few.
GEDC0444 
Whenever I work in the Apothecary, I take the time to make a nice pot of tea. Today I chose Gunpowder Green tea. I just adored this woman’s explanation for the type of situation gunpowder green might be useful for
Major in the movie A Bridge Too Far: Major: "I've got lunatics laughing at me from the woods. My original plan has been scuppered now that the jeeps haven't arrived. My communications are completely broken down.
Do you really believe any of that can be helped by a cup of tea?"
Corporal: "Couldn't hurt, sir."

Big hugs to all who visit Comfrey Cottages

Sunday, November 14, 2010

Herbal Extraction and Preparation

I am learning about herbal extractions and the different descriptions and methods. Water, alcohols,vinegar, honey and oils are the menstrums we will be using. Good thing Eric and I just harvested some honey and made vinegar! I have made an infusion in my teapot, to enjoy while working.  Good thing I made it in the bigger pot this time, as my friend Val stopped in while in the middle of all this:) I will make various decoctions, extract tinctures, vinegars, infused oils, and infused honey today also.
I am also learning about fomentation, ointments and poultices. I chose to try lavender essential oil for a cool fomentation on the back of my neck for a bit of tension and headache-yness I have been having. I could feel the muscles relax and calm down as the herbal constituents permeated my skin. A different kind of calm from simply inhaling lavender! This was a muscle and nerve ending kind of calming:)
For my ointment I used some comfrey oil I had previously infused, some of our own beeswax.
GEDC0392
I hope when you click on the picture and it enlarges, the beautiful green vibrancy of the comfrey oil is evident to you:)
GEDC0386
GEDC0388
Of course, I had to set the stage for the these herbal preparations by assembling my recipes I would be working on. See that cute little felt heart hanging from the cabinet door? My sweet friend Rita made that for me and it is a lovely herbal sachet:) So nice to use a clothespin to hold a recipe I am working on:) Each time I clip the pin, scent is released:) The other little hive thing was actually suppose to be a picture display piece, but I find it handy to hold the herbal recipe queue.
GEDC0387
GEDC0391
I adore my cast iron melting pot by Lodge, for melting beeswax and working with warming oils. It does retain heat though, and in order to get on with it, I poured the melted beeswax and comfrey oil warm mixture into another pan, to cool enough to be whipped up and then lavender essential oil added it to it.
GEDC0394
I like the consistency of the final product and think the comfrey and lavender will work well together for the purpose of this ointment! When finished, I include these recipes in my little recipe box.
GEDC0395
While I was busy in the kitchen apothecary anyway, I made the Varicose Vein Spray I had in the remedy making queue:)
GEDC0397
GEDC0398
Yikes, I need to get in the habit of always including the botanical names of the herbs, as well as these common names! I will make a new label for this while working on the other labels I need to make tonight!
Big hugs to all who visit Comfrey Cottages

Formalizing the Apothecary

 I came to herbalism through my garden, woods and field walks, my bees, ancestral call, and our families children’s eyes:) Since I didn’t start with herbs, but accumulated bits and pieces through the last few years, I had been feeling rather disorganized and am enjoying getting more organized in my learning and the step by step progression of learning how to better support, nourish and comfort my small village. Today finds me formalizing my apothecary. Seems a good idea to do that before the alchemy, so I spend the entire day devoted to straightening up the apothecary and making a list of what I do have herb wise. I still need to tweak the list and then make labels for everything with both the common name and the botanical name.I have been meaning to for a long time, but you know how it is when you have a million irons in the fire… so now I have my list of herbs and new labels right next to me on the couch so tonight when I am visiting with my hubby I can still be doing homework at the same time;-) He is being a sweetie and supportive of my time spent on this:) I expected no less though, as he has thoroughly supported and helped me with my gardening and beekeeping endeavors, also. So Wednesday I spent the whole day inventorying just the herbs and getting their cabinets arranged. So many of these herbs I have either grown or wild crafted myself that you will see in these cabinets.
This cabinet was my original herb cabinet. Due to the fact it has a glass front and is in a bit of window light, I have changed its function. 
GEDC0316
My darling daughter Michelle, gave me that sweet little pillow. My soul sister in Wales, Linda, made me the cute little Grandma’s Remedies sign. And my sweet Katee Bug gave me the little bee and heart window cling. I like to intersperse little gifts and memories throughout my apothecary. They fill me with joy and make me pause before I ever work with herbs, to focus on the love I want to put into making herbal preparations. Time is always of the essence for me, and to see little reminders of love, inspires me to become present and focus on what I am doing, rather than be thinking of a million things still beckoning for my time:) The drawer has some teas, labels and little muslin tea bags.
GEDC0317
See those little tincture bottles in there? Those were quite a big deal for me when I got them! I think that is when I decided to quit being just a dabbler and get focused on learning!
GEDC0315
The cabinet itself was a gift from my husband when my herbal love outgrew my countertop space! lol On top of it, you can see my honey bottling pail. Now that tall, thin white cabinet off in the corner by the window, became my second cabinet when things kept expanding. On top of it is a big pail full of lovely wax. Eric and I are hoping to make beeswax candles this winter and some will be used in salves, ointments, and for little decorations for presents:) The red cabinet is my newest cabinet. Those corner two are holding most of the dry herbs.
cabinet
For now, I have kept some of the essential oils, salves, and extract tinctures with their corresponding dry herbs, if they have one.
aredcabinet
There is one other cabinet in my kitchen. Now folks, this took some ingenuity to accomplish this as my husband is not tiny and has to fit through doorways, so figuring out a way to get all four of these cabinets in my eat in kitchen in my hobbit cottage, well…. let us just say I think it is a miracle! lol This other cabinet has the rest of the dried herbs (each cabinet is alphabetically arranged with the tall white one being first, the red cabinet second and this pinkish one (a gift from my daughter) the end of the alphabet plus tinctures, elixirs, and vinegars we have been making this year at Comfrey Cottages:) The bottom shelf has the pots and pans, funnels, cheesclothes, etc we use in making salves and melting beeswax.
acabinet
This next picture shows that next to the cabinet is a five generation picture of my mom, grandma, daughter, granddaughter and I together. We have since lost mom and grandma, but they are still here in our hearts and in my work and intentions. With their help my intentions are to make wonderful preparations to keep myself, Michelle, Lily and the rest of our family and friends, nourished and healthy working with these herbs.
GEDC0313
Luckily, we have a small bedroom right off the kitchen, that I have taken over as part of the apothecary. There are three more cabinets in there and a baker’s rack.
GEDC0328
The green one is for books and extra small jars. The white one has herbal oils and honeys, as well as canned goods such as violet and wild plum jellies:) Some of the bigger supplies are on bottom shelf. What is the ammonia for you say? A mushroom identifying helper:) Too many interests right? LOL But they all blend together and need tools! lol Thus… lots of cabinets:)
acabinet2
I can’t grow inside plants easily or well. We just have too many large trees and cats! LOL But, when my daughter gave me the bakers rack I am trying to grow just a sage and an aloe plant on the top shelf. Hopefully the cats won’t figure that out! I TRY to put the current things I am studying on the shelf. The wooden shelf is nice for garbling herbs, while looking out at part of the garden:)
bakers
And underneath it holds some honey supers waiting to be processed.
bakershoney
While arranging, I took the time to check each jar for freshness, using taste, sight, and smell and ended up with quite a few rejects! I used them in the bee smoker, while working my friends apiary with Eric, and they made a nice sweet smoke the bees reacted well too!
herbs
There is one more cabinet in that bedroom/apothecary area, it is yellow and holds liquor, some spices, extra bottles, spoons, etc etc
Now I need to make the labels, inventory all my tools, such as funnels, strainers, etc. And determine what I would still like or need.
threebears
Big hugs to all who visit Comfrey Cottages, from me and Comfrey Fairy! Who by the way, is mightily pleased with this tidying up around here! LOL
comfreyfairy
Forgot to mention, Dylan is starting the potty training process again! Aunt Michelle comes and visits almost every lunch hour she has, and is seen here reading Dylan one of his potty training themed books:)
auntmichelle